Friends, if you are a blogger or you have a website on blogsport.com and you provide the download link in your article. So this article is going to be more beneficial for you.
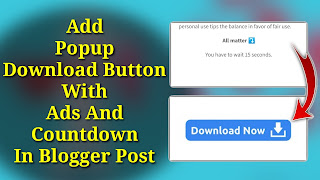
How good it is if we give the download button in our article. A pop up box will open as soon as it is clicked. In which there are some timers, the download button appears after the timer completes. The file gets downloaded as soon as the button is clicked. The advantage of this is that the user will spend more time on your website. This will quickly rank your website in Google or any other search engine.
There is not only one benefit of this download button. If your website is AdSense approved. So you will see double benefit because this popup download can put two ads. Because of which your earning can increase up to 2 times.
How to Add Popup Download Button With Ads And Countdown In Blogger Post
- Login to your blogger blog Dashboard.
- Then go to Theme > > Edit HTML.
- Click anywhere inside the code area and press Ctrl + F keys to open the search box.
- Now, Search for </head> tag and paste below code just before of this tag.
<style>.modal {display: none;position: fixed; top: 0; right: 0; bottom: 0; left: 0; text-align: left; background: rgba(0,0,0, .9); transition: opacity .25s ease;z-index:999; }.tg-pop__bg{ position: absolute; top: 0; right: 0; bottom: 0; left: 0; cursor: pointer; }.tg-pop { display: none; }.tg-pop__inner { transition: top .25s ease; position: absolute; top: -20%; right: 0; bottom: 0; left: 0; width: 50%; margin: auto; overflow: auto; background: #fff; border-radius: 5px; padding: 1em 2em; height: 50%; }.tg-pop__close { position: absolute; right: 1em; top: 1em; width: 1.1em; height: 1.1em; cursor: pointer; }.tg-pop__close:after, .tg-pop__close:before { content: ''; position: absolute; width: 2px; height: 1.5em; background: #333; display: block; transform: rotate(45deg); left: 50%; margin: -3px 0 0 -1px; top: 0; }.tg-pop__close:hover:after, .tg-pop__close:hover:before { background: #aaa; }.tg-pop__close:before { transform: rotate(-45deg); } @media screen and (max-width: 768px) { .tg-pop__inner { width: 90%; box-sizing: border-box; } }.adpop-top{height: 40px; width: 100%; border-bottom: 1px #E5E5E5 solid;}.adhtml{margin: 14px 0 4px; min-height: 260px;}.adpop-content{height: 330px;}#tg-downloadx{display: inline-block; height: 30px; line-height: 30px; width: 140px; text-align: center; background-color: #005af0; color: #fff; font-size: 15px; border-radius: 8px; text-transform: capitalize; border: 1px solid #212121!important; margin-top: 1px;}.download-pop{line-height: 16px; margin: 5px 0 5px;font-size: 14px;position: relative;}.btn-at{display: block; height: 50px; color: #fff; font-size: 24px;text-transform: uppercase; background: #005af0;text-align:center; line-height: 50px;width: 200px; margin: 150px auto; transition: all 0.4s ease-in;}.adpop-top h2{margin:0}</style>
- Now, Search for </body> tag and paste below code just before of this tag.
<script>//<![CDATA[const modal = document.querySelector("#my-modal"); const btn = document.querySelectorAll(".btn-at"); const closeModal = document.getElementsByClassName("tg-btnclose")[0]; for (let i = 0; i < btn.length; i++) { btn[i].addEventListener("click", function () { modal.style.display = "block"; }); } btn.onclick = function () { modal.style.display = "block"; }; closeModal.onclick = function () { modal.style.display = "none"; }; window.onclick = function (event) { if (event.target == modal) { modal.style.display = "none"; } };var downloadButton = document.getElementById("tg-downloadx"); var counter = 20; var newElement = document.createElement("span"); newElement.innerHTML = "Please Wait 20 sec"; var id; downloadButton.parentNode.replaceChild(newElement, downloadButton); function startDownload() { this.style.display = 'none'; id = setInterval(function () { counter--; if (counter < 0) { newElement.parentNode.replaceChild(downloadButton, newElement); clearInterval(id); } else { newElement.innerHTML = "Please Wait" + " " + counter.toString() + " " + " sec.... "; } }, 1000); }; var clickbtn = document.getElementById("btn-at"); clickbtn.onclick = startDownload;//]]></script>
- Click Save Theme.
- Open Blogger Dashboard And Open The Post In Which You Want To Add Pros And Cons Table.
- Now Go To HTML >> And in the post where you want to add Pros And Cons Table, paste the code below.
<div class="btn-at" id="btn-at">Download</div><div class="modal" id='my-modal'><div class="tg-pop__bg"></div><div class="tg-pop__inner"><div class="adpop-top"><label class="tg-pop__close tg-btnclose"></label><h2 style="margin: 0px;">Download Your file</h2></div><div class="adpop-content"><div class="adhtml">Ad Code</div><div class="download-pop"><a class="button" href="#" id="tg-downloadx">Download File</a></div><div class="adhtml">Ad Code</div></div></div></div>
- Replace # with the URL of download file.
- before publish your post see a preview of your blog post.
- If preview is correct then simply publish it.


